


Post by Kit Fisto on Feb 28, 2007 23:33:02 GMT -5
[gvid]2909813048625108366&hl=en[/gvid]
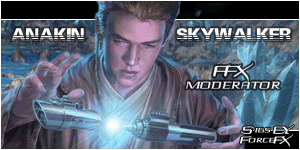
Here is the basic way to make great lightsabers in Photo shop
I will make a video for it ,and include many tricks and tips as well,but for now here is the text version of the tutorialt
It done like this
Make a new layer,
put
MODE: TO SCREEN
AND (THIS IS IMPORTANT OR IT WONT WORK)
UNDER SCREEN WHEN YOU SELECT IT CHECK MARK
"FILL WITH SCREEN WITH NEUTRAL COLOR BACK"
Remember when you make your screen layer if you don`t select "FILL WITH SCREEN WITH NEUTRAL COLOR BACK" it WONT work
From there just draw out the saber with your pen tool and go to Gaussian blur and set to 1
Then duplicate this layer 3 more times (ctrl J)
on the 2nd layer put Gaussian blur to 10
The the 3rd put Gaussian blur to 20
Then the 4th Gaussian blur or 40
(in some pics you might want to add another layer and put it to 80 but not always)
Ok now merge all your lightsaber blur layers down to 1 layer (ctrl E) till they are all in the neutral black layer..
Now for the color ( remember the color will not work if your didn't select "FILL WITH SCREEN WITH NEUTRAL COLOR BACK" when you made your screen layer originally
So go to image,adjustments,color balance and select your sabers color...its done..
TIPS:
---------------------------------------------------------
T make your saber tip look even better use the rectangular marquee tool over the tip of the saber and go to "filter,noise ,median) this will round it off..
-------------------------------------------------
If your saber is not jumping out at you because your background is too light,select the background layer and click and hold down the hand looking icon on your tools pallet and select "Burn tool"
Now burn under the saber..
---------------------------------------------------
If you overdue it with the bum tool,no worries go back to the hand looking icon and select the dodge tool,this lightnings things..
-----------------------------------------------------
Also if you decide you want to quickly change the sabers color now that its made,easy just go to Image,adjustment,hue saturation,and adjust the hue.
============================
www.youtube.com/watch?v=FRouJsv7btM
I just did another lightsaber tutorial,I will show you how to turn any pic into a Star wars pic.
I show you how to use the clone tool,and how to properly make lightsaber lens flares,as well as a alternate methos of making blades with the brush instead of the pen tool..


 }}Force Power{41998}

 }}Force Power{298}


 jk man but nice tut.

